Practical tutorial · May 2026

How to Use Claude Design: the Complete Guide to Anthropic's New Design Tool

Anthropic launched Claude Design on April 17, 2026. It is a tool for creating prototypes, slides and visuals by talking to Claude instead of dragging rectangles on a canvas. This guide explains, with real screenshots, what Claude Design is, how to access it, how to work with it, and the 7 tips the Anthropic design team shares for getting the most out of it.

✓ Real interface screenshots ✓ Comparison with Figma and Canva ✓ 7 tips from the Anthropic team

What Claude Design Is and Why It's Different

Claude Design is a new product from Anthropic Labs that lets you create designs, interactive prototypes, presentations, one-pagers and brand assets by describing them in natural language. It lives at claude.ai/design and runs on Claude Opus 4.7, the most capable vision model in Anthropic's catalog.

The difference from a traditional editor is structural. In Figma or Canva, you open an empty canvas and move elements with your mouse. In Claude Design, you open a conversation: you describe what you need, Claude delivers a first version, and then you refine by talking, commenting, or adjusting custom sliders that the AI itself creates based on context. The primary input is words, not clicks.

Three quick facts to anchor you:

How to Access Claude Design and What You Need

Access is direct: go to claude.ai/design with your Claude account. If you see the main panel with the «Designs» tab, you're in. If the tool is missing, it hasn't been activated on your account or your plan doesn't include it.

Requirements:

Usage consumes your standard plan limits. If you exceed them, you can enable extra usage from the account settings.

The Claude Design Interface: Chat and Canvas

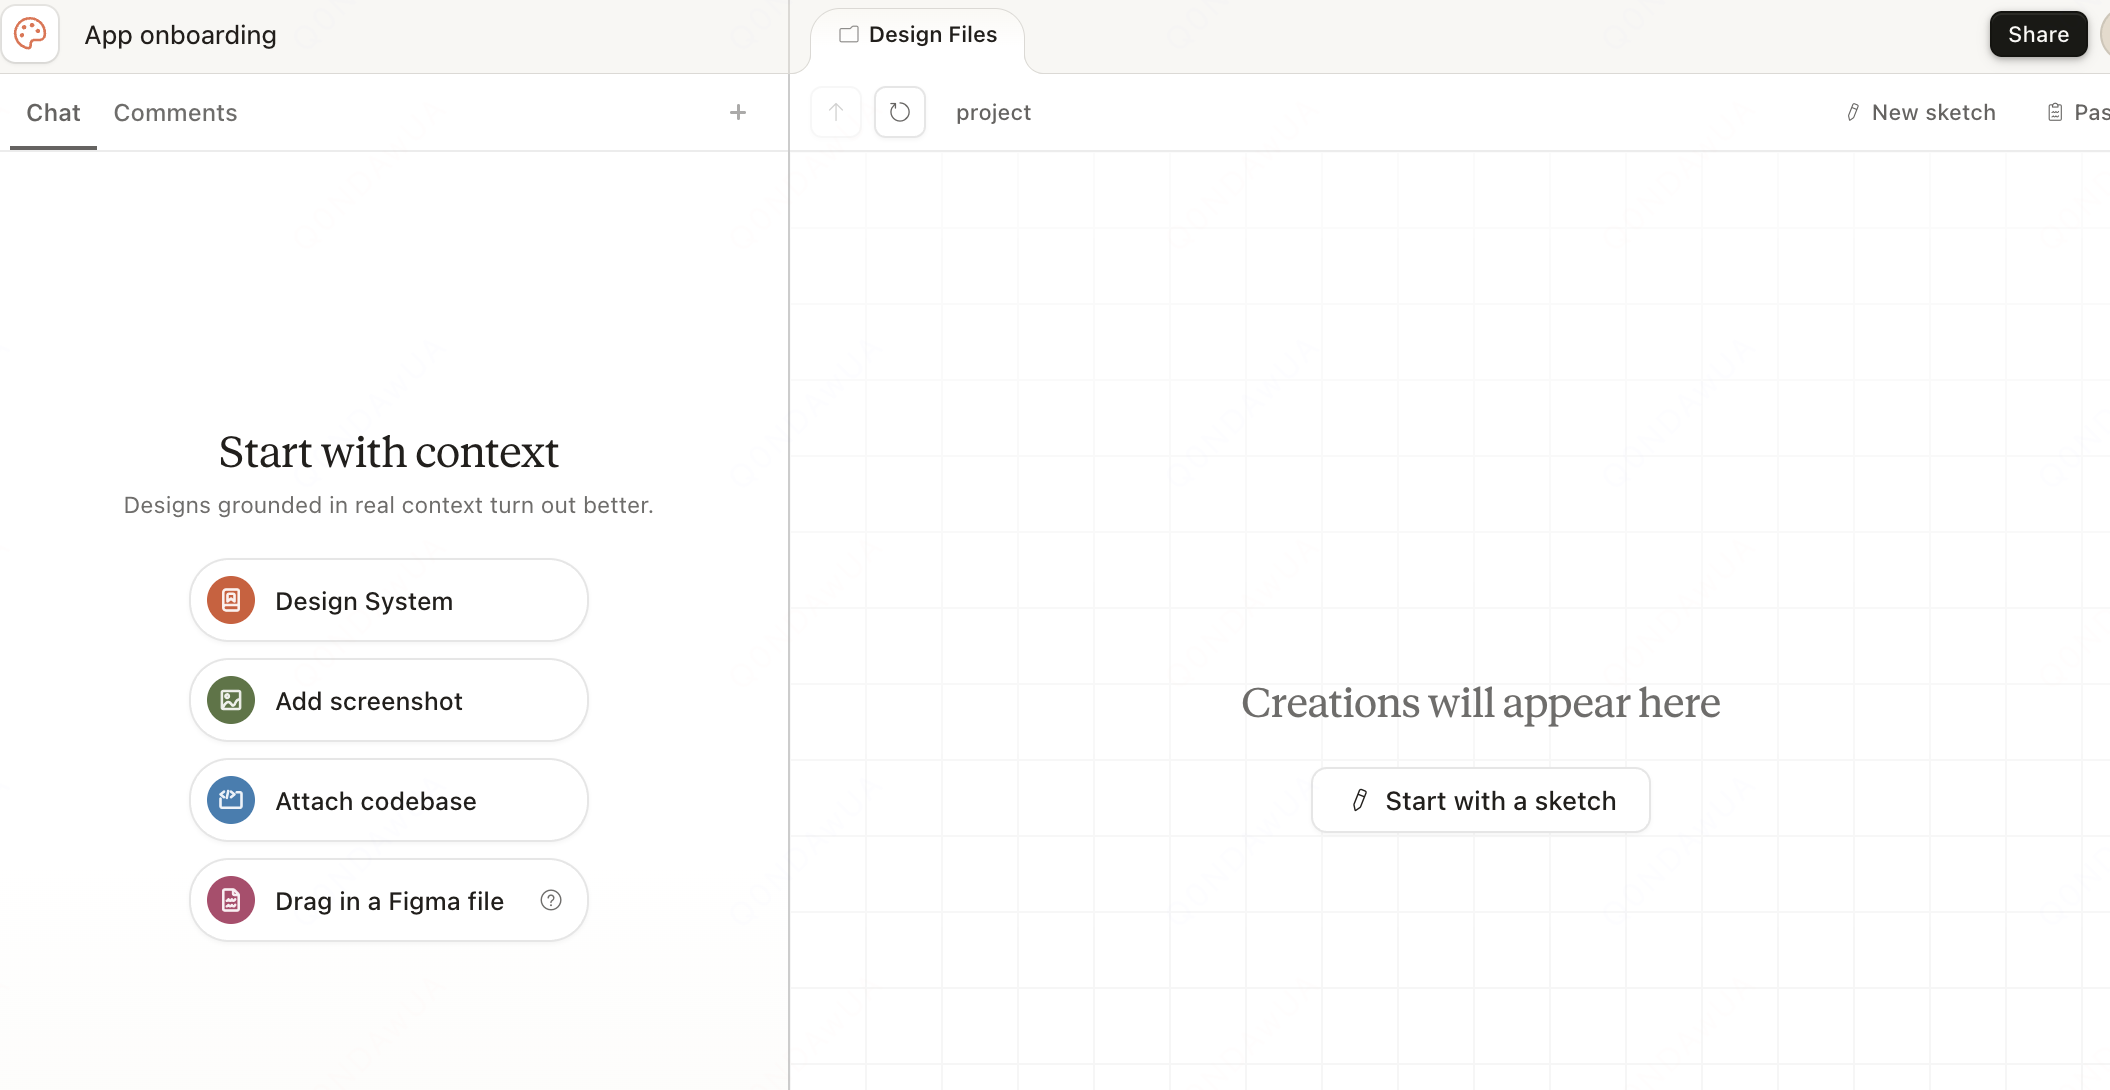
Opening Claude Design shows a screen split in two zones: on the left, a panel for creating projects and chatting with Claude; on the right, your design library. When you enter a project, that same split becomes chat on the left + canvas on the right. That is the central metaphor of the product.

Claude Design home screen by Anthropic Labs, showing the Prototype, Slide deck, From template and Other tabs along with the Wireframe and High fidelity options
Claude Design home screen. Four project types and two fidelity modes before you even start.

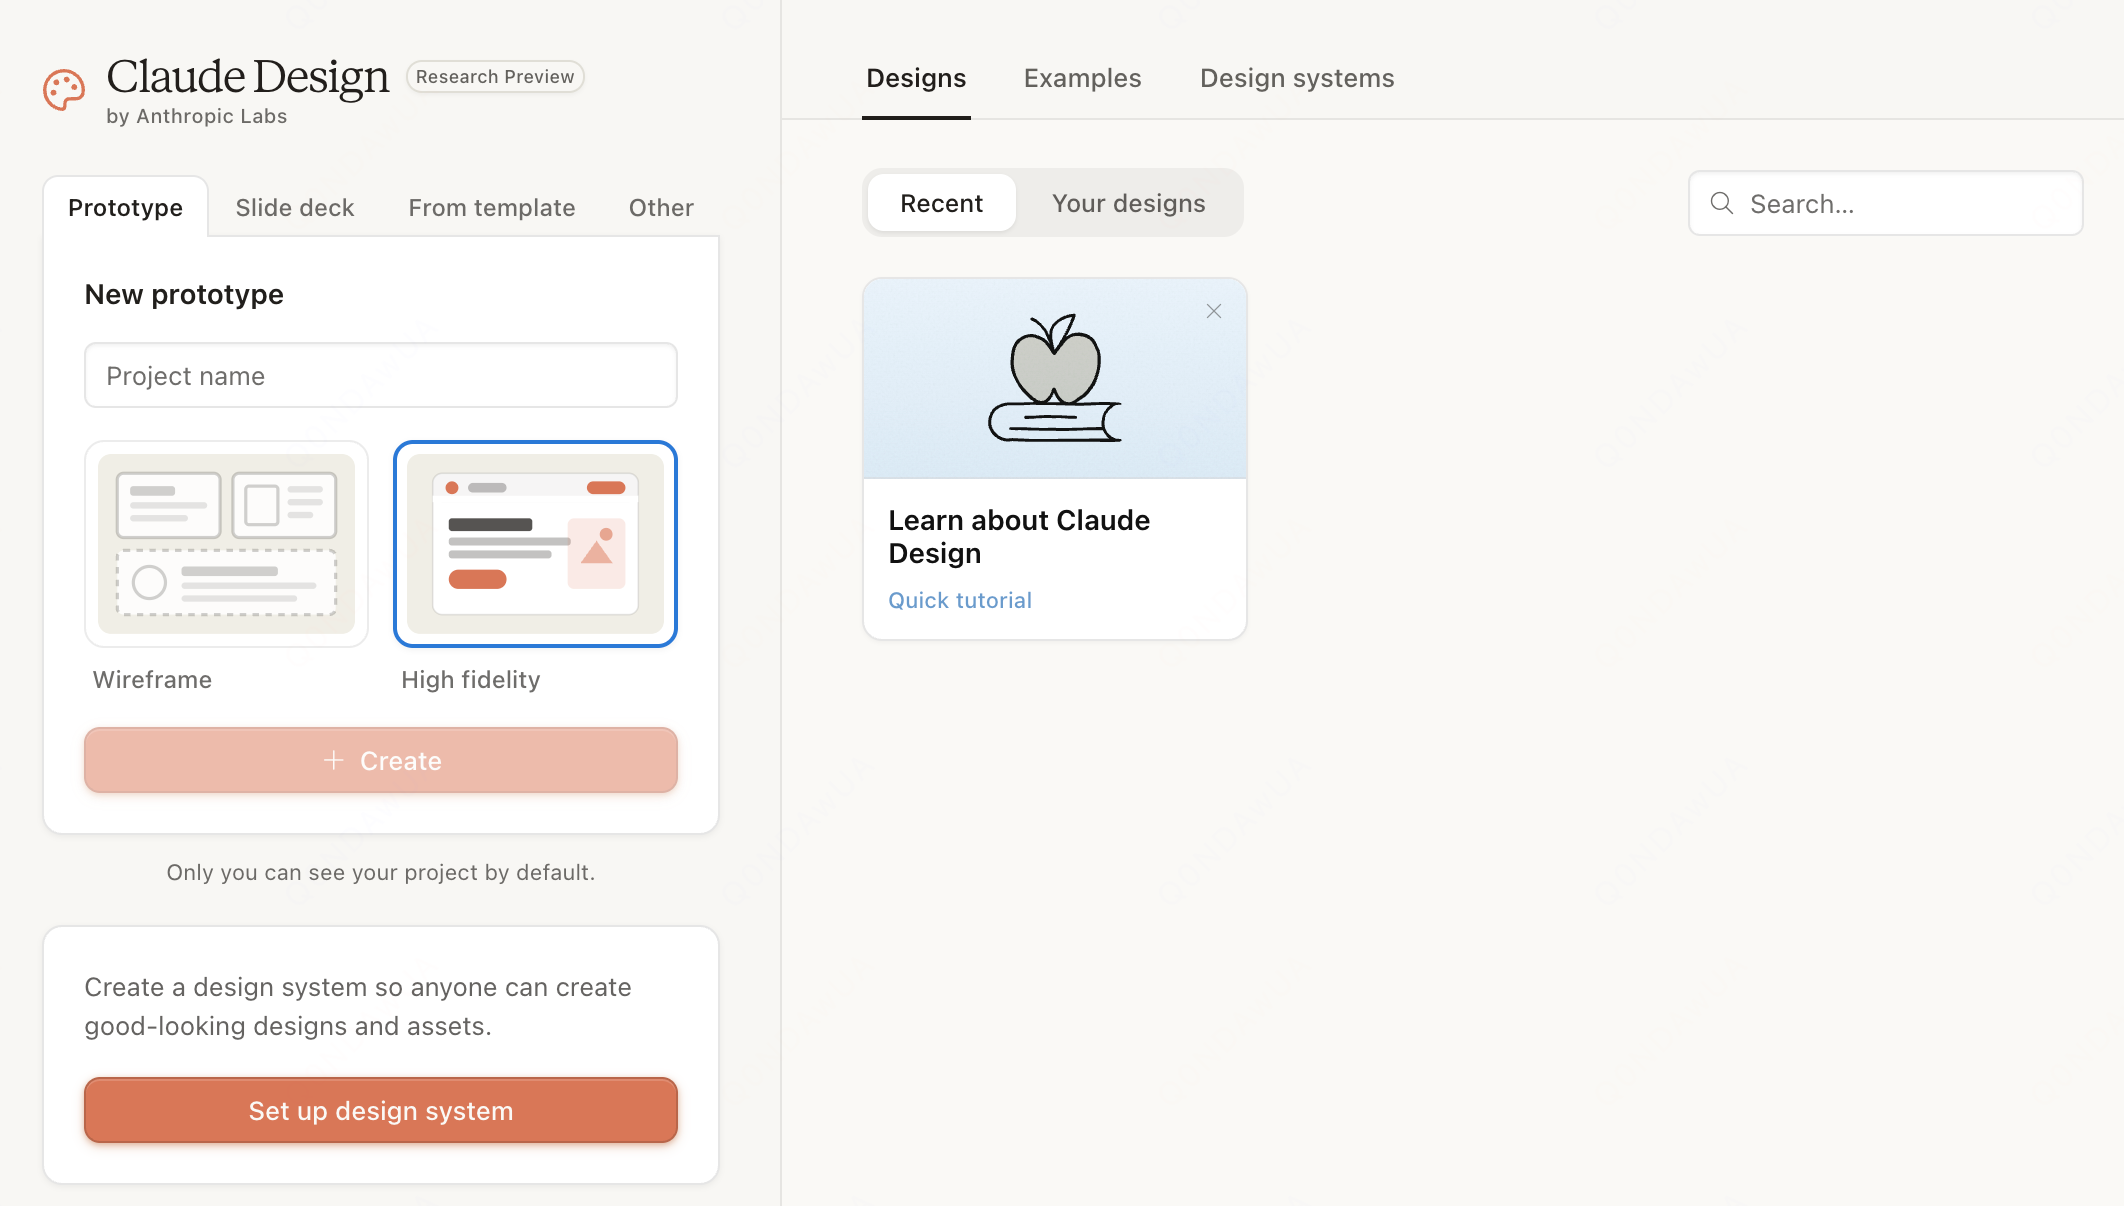
At the top of the left panel you'll see four tabs that define the project type, and below them two fidelity modes. Before clicking «Create» once, Claude is already asking for two decisions that will shape everything that follows.

The 4 Project Types in Claude Design

Claude Design offers four starting categories. Choosing well here saves a lot of iteration time.

Each category is tuned with different internal prompts. If you choose «Slide deck» and then ask for a landing page, Claude will make it, but it will be biased toward slide-like structure. Better to choose well from the start.

Wireframe vs High Fidelity: Which to Choose

Before generating anything, Claude Design forces you to choose a fidelity mode. It looks aesthetic but it actually affects speed and use of the result.

ModeLookSpeedWhen to use it
WireframeGray boxes, no color, neutral typeFastValidating structure, flows and hierarchy. Early product meetings.
High fidelityColor, type, shadows, real iconsSlowerFinal design, customer demos, brand assets, exports to Canva or PPTX.

A useful pattern: always start in wireframe. Once the structure is validated, duplicate the project and bump it to high fidelity. That way you don't burn time tweaking colors on screens you might throw away.

Set Up Your Design System Before Anything Else

This step matters more than any other for separating a casual Claude Design user from someone who consistently ships quality work. The app has an explicit button on the home screen: «Set up design system».

Claude Design project screen with the empty canvas and four context options: Design System, Add screenshot, Attach codebase and Drag in a Figma file
«Start with context» — Claude Design asks for context before generating anything. This is the step that improves output the most.

During setup you can feed Claude with several sources at once:

Flomerboy, a designer on Anthropic's verticals team, summarizes it in his X thread from April 17, 2026: «An hour of setup and refinement here is worth it». The line is deceptively simple: 80% of output quality comes from this step.

The 3 Ways to Iterate a Design in Claude Design

After the first draft, things are rarely perfect. Claude Design offers three editing channels, and choosing the right one in the right moment is what separates a slow user from a fast one.

  1. Chat: for structural or global changes. Examples: «switch the whole palette to dark tones», «add an onboarding step before signup», «turn this into a mobile version». Chat rewrites broad chunks.
  2. Inline comments: click a specific element on the canvas and describe the change. Claude applies it only to that element. Ideal for surgical tweaks: «this button is too small», «swap this icon for a calendar one».
  3. Claude-generated sliders: for fine adjustments like size, spacing or color intensity, Claude spawns dynamic sliders based on context. Move the control and see the change in real time, no typing required.

The Anthropic team's advice is clear: don't try to verbally describe dozens of small tweaks. When there are many details, inline comments are far faster than chat.

How to Import Materials: Documents, Code and Web Captures

Claude Design isn't limited to text. You can start a project from almost any format.

Web capture is especially useful when you're prototyping a new feature on a product that already exists: you start from the real look instead of zero, and stakeholders see something familiar from the first second.

Export to PPTX, Canva or HTML, and Handoff to Claude Code

When your design is ready, Claude Design offers several output formats designed for different workflows.

Share and export menu in Claude Design with options to download as ZIP, export as PDF or PPTX, send to Canva, export as standalone HTML and handoff to Claude Code
Export menu. Options cover everything from internal sharing to direct handoff to Claude Code for implementation.

The available options:

The Claude Code handoff deserves separate attention. Instead of exporting images that a developer has to reinterpret, Claude Design generates a structured bundle that Claude Code can convert directly into real components in your project. If you already use Claude Code, this is the biggest difference compared to Figma.

Claude Design vs Figma vs Canva: Which to Use and When

The most common question about Claude Design is whether it replaces Figma. The short answer: no, but it changes the conversation. This table summarizes the practical differences as of May 2026:

DimensionClaude DesignFigmaCanva
Primary inputNatural languageDirect manipulationTemplates + drag & drop
First-draft speedSecondsMinutes to hoursMinutes
Pixel-perfect precisionLimitedFullMedium
Persistent design systemYes, importedYes, nativeLimited
Multi-user collaborationShare and commentReal simultaneous editingShare and comment
Handoff to engineeringDirect bundle to Claude CodeInspect + pluginsLimited
Best use caseQuick prototype + pitch deckTeam product workMarketing + social media

Jane Street's engineering team was among the first to publish a real-world account. Their May 2026 blog post took a direct stance: «I design with Claude more than Figma now». For internal prototypes and rapid exploration, Claude Design won the fight. For team product design with large systems, Figma is still the main tool.

Bottom line: Claude Design shines when there is urgency, no designer is available, and «good enough» quality beats pixel-perfect quality.

7 Tips From the Anthropic Team for Using Claude Design

Flomerboy, a designer on Anthropic's verticals team (he serves 7 internal products), posted an X thread with his practical tips. Adapted:

  1. Set up your design system and your core screens first. An hour invested here is worth ten later.
  2. Iterate live with your engineers. Designing a new feature in a single meeting is realistic: Claude generates mockups so quickly that the conversation stays high-level and the team sees changes instantly.
  3. Use the Comment tool for surgical tweaks. After the first draft there will be dozens of details to adjust. Describing them verbally one by one is slow. Better: click, comment, next.
  4. Ask Claude to make video demos of your ideas. Claude Design can do almost anything you can think of, not just static screens. It's closer to Claude Code than to a canvas-based editor.
  5. Hook up your connectors (docs, Slack). Once configured, you can send prompts like: «read the product roast notes and create a deck exploring design solutions for each point». Take a walk and come back with a fresh first draft.
  6. Ask Claude for bespoke on-the-fly tools. Don't try to use Claude Design like a canvas editor. It's a different animal with different superpowers. Experiment and break what you know.
  7. Know when to slow down and do things by hand. New icons, spot illustrations, naming. Some details require human craft. Knowing when AI speed works against you is its own art.

Real Use Cases and Who Claude Design Is For

In the first month after launch (April 17 to May 2026), the cases that worked best fell into five clear profiles:

Current Limitations of Claude Design

This section matters: anyone telling you Claude Design «replaces every editor» is selling smoke. The real limitations in research preview:

Next Steps

If you've read this far, you have the full Claude Design map. Where you go next depends on what you'll use it for:

And if you subscribe to Claude Pro or higher, open claude.ai/design and spend the first hour on Flomerboy's first tip: setting up the design system properly. It's the highest-return investment in the whole tool.